I know this may be a bit challenging, so below I have posted all the step-by-step instructions you need to create your "levitating" picture. It's actually a LOT easier than it looks, trust me.
Ever since I began these photo competitions (almost a year ago already!) I was always too afraid to make a theme too challenging since I feared nobody would care to participate. Well I figure we've been doing these competitions long enough and would like to challenge all of you to something completely different. The winning prize? An 11x14 print of one of my own levitating pictures (both winners will choose their winning print in my "Self-Portrait" album on my facebook page) sent to your house completely free of charge.
Before I get to the instructions on how to create a levitating picture, I would like to say that I am still very new to this surreal/fantasy type photography myself, but having a BLAST doing it. I just discovered Flickr and the whole "365 Project" movement that has epitomized our generation of young, emerging photographers. I never even knew this movement existed until recently, and have greatly been inspired by "Flickr Famous" photographers such as Brooke Shaden and Chrissie White (Chrissie offers Photoshop tutoring, if interested email me and I will get you connected with her, she helped me a TON).
ANYWAYS, onto the instructions. Below I am going to post a couple of "before and after" photoshop edits, and give instructions on how I created these pictures. PLEASE FEEL FREE to use any of my ideas/concepts for your own levitating pictures. You can try and recreate my exact levitating pictures if you'd like, or come up with a completely different type of levitating picture of your own style - whatever works best for you!!
There a various methods to creating a levitating picture (and a lot of this stuff you can just find on google) but for now I will show you the way in which I have done it. Things you will need: Tripod, camera, photoshop.
FIRST, find a cool setting to take your levitating picture. Now, set up your camera on a tripod. THEN, take a picture of JUST the setting without you in the picture (as seen in the picture below).

THEN, find something to prop your body on, such as a stool or ladder (in this case I used a nightstand, as seen in the picture below). After getting my body into position on the nightstand, I set the camera to "self-timer" to take the picture (or you can use a remote for your camera so you don't have to run back and forth from the camera -- remotes are only $9.50 on Amazon). OR, you can have someone take the pictures for you if that's easier.

There, now I have my two images. The next step is to import them into Photoshop. Bring up both of these images into Photoshop, and by using the 'move' tool (hit the letter 'V' on keyboard to activate the move tool), place the image of you in the picture on TOP of the image of just the setting. Then using the eraser tool on Photoshop, erase away at the nightstand and voila! It is now starting to disappear. This is why you need to take a picture of JUST the setting (without you in the picture) so that when you erase away the prop your body is on, the background will start to show through. The final result of this picture is below:

How I added in the sheet music: I took several pictures of me holding the sheet music to the camera, and then on Photoshop, individually selected each sheet of music and placed them within the picture. I wish I had screenshots of me holding the sheet music to the camera so you can see what I mean, but I deleted those pics already to save room on my computer (I think you get the idea though). I achieved the 'blurry motion effect' on the sheet music by waving them up and down really fast as the camera took the picture. CONCLUSION: The above image is essentially 25 pictures in 1 picture. This is called compositing, a technique many photographers use. If my instructions don't make sense (I know that I can be utterly terrible at explaining things), then google 'how to make levitating pictures' OR, email me at: mandynikon@gmail.com for ANY questions you may have. I would be happy to even edit your pictures together if you'd like.
Here is the link to a GREAT article that shows 65 stunning examples of levitating pictures from other photographers + really great tutorials (seriously, I cannot express in words how MUCH this article helped me when first learning how to make levitating shots):
http://www.hongkiat.com/blog/levitation-photography/
BELOW ARE MORE EXAMPLES OF 'BEFORE AND AFTER EDITS.' I hope I was able to teach you something new, and hope you all go out and create some beautiful and creative levitating shots!! CAN'T WAIT TO SEE WHAT YOU COME UP WITH!!!
Before:

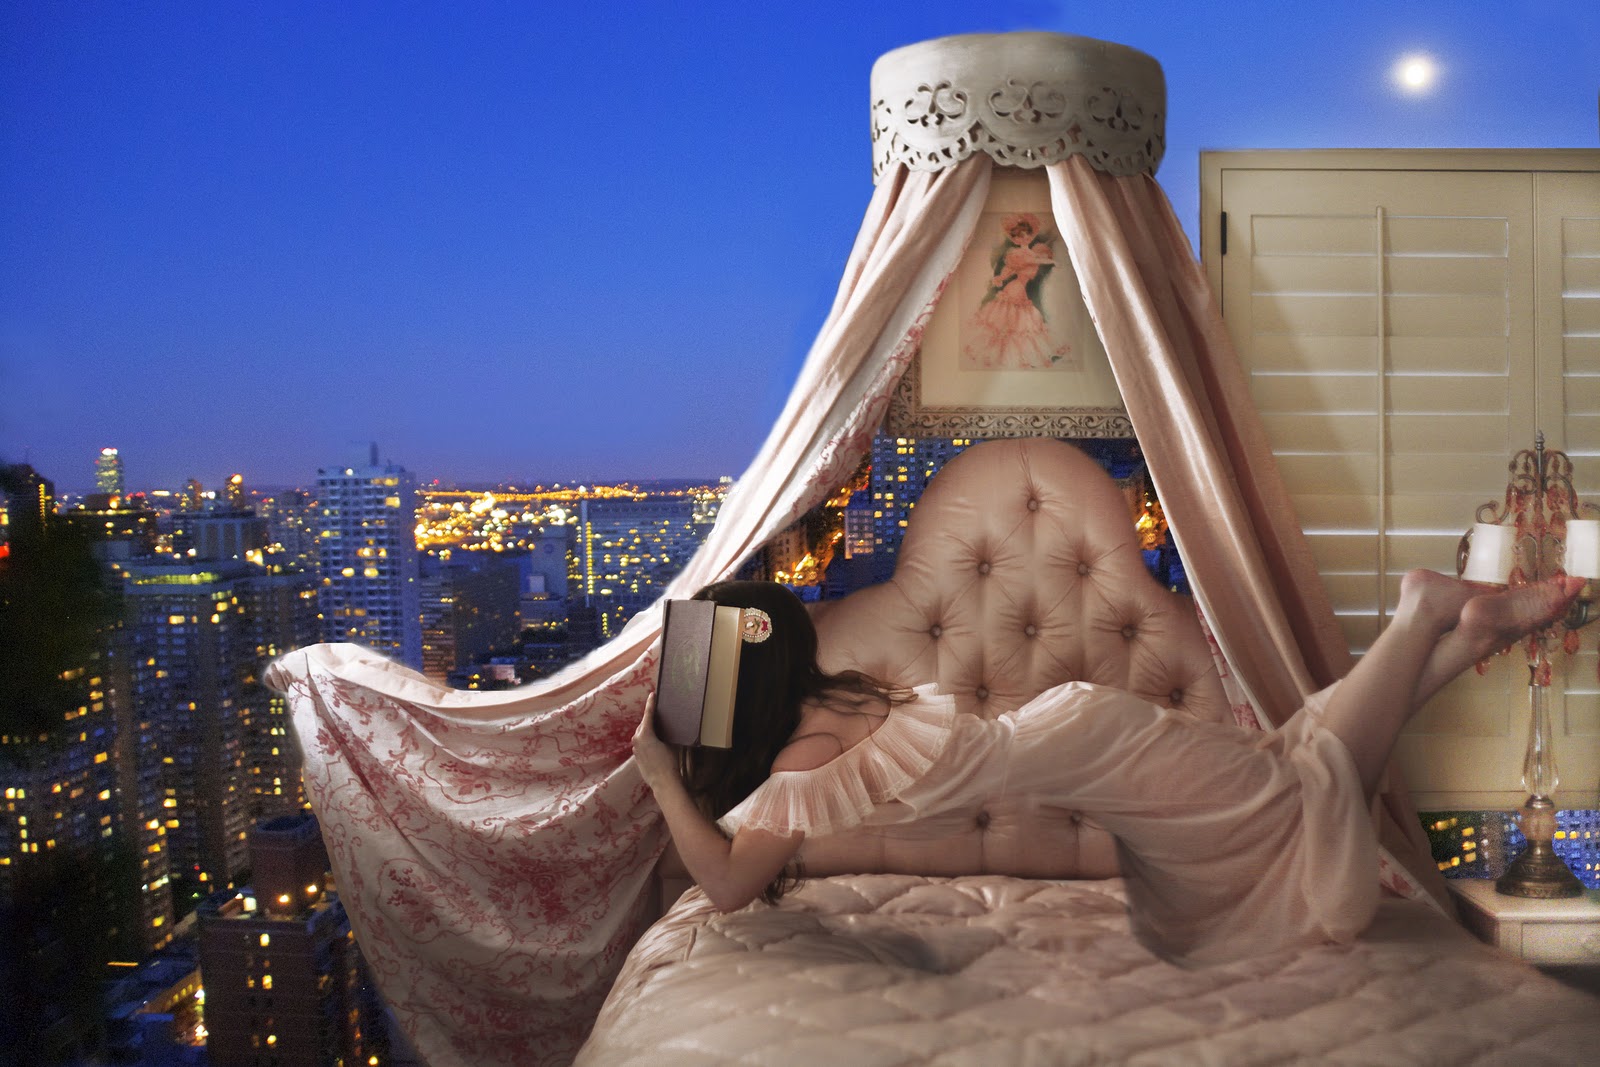
After:

*NOTE: I did not like how my feet looked in the before image, so, I photoshopped in different feet from a completely different picture I had taken during this shoot. Also, for the wallpaper, I took an image from the wallpaper at a hotel and photoshopped it into the walls of this picture (you can see the image below that I used) and then also added in some texture.

Before:

After:

Before:

After:

*NOTE: I did not like how there was an open pocket of space above the fence in the 'before' image, so I used the clone tool to patch up the open space. Paying attention to little details like that really help execute your levitating image even more. When you are editing your image, really look at it and think 'Do I like all the areas of this image? What can I improve? What areas can I edit out? How should the colors look in this area of the photo? Etc.'
Before:


After:

*NOTE: As you can see, I used details from various different pictures and combined them all together. I circled areas of the picture I used for the final result.
Before:


After:

Before:


After:
I don't have the "before" pictures to the image posted below, but just wanted to tell you that it's basically 7 pictures in one. For instance, I took one picture of me flipping my hair, one picture of just my dress flying out, one picture of me jumping for the camera (then later used the 'Transform' tool to rotate my body to make it seem as if I were flying) and photoshopped those details and combined them all into one picture:

*NOTE: Just for the sake of not wanting to confuse you guys, many of my examples above don't have the picture of JUST the setting without me in the picture. This is because I deleted those long ago, wanting to save space on my computer. It is VERY important to get that first picture of JUST the setting, or else the levitation won't work! Hope that makes sense :)
Submissions for the competition begin as of today, Tuesday October 25th. I will give two full weeks for you to submit your pictures into the competition, and I will post the finalist album on Tuesday, November 8th. Voting will take place for the following two weeks and BOTH winners will be announced on Tuesday, November 22nd. How both winners will be determined: one will be chose by ME and the other by the most amount of 'likes' their picture has.
Both winners will be announced Tuesday, November 22nd on my facebook fan page: www.facebook.com/nikonphotography
Good luck :)


